External Access Configuration #
Currently, external access need some manual setup and some technical background, we will make the process more user-friendly later. There are mainly 2 options:
- Use the 3rd party tunnel service
- Open port mapping on your router
Use the 3rd party tunnel service (option 1) #
There are a few tunnel services available for free use, most tunnel services require a client application running on your device, and set up a connection to the service running by the service provider, and it will give a subdomain name for you to use, if you access the URL with that subdomain, the tunnel service will forward the traffic/request to the client application.
ngrok is a free and popular tunnel services, requires registration before use, and need pay for customize subdomain. You can also use other tunnel services as well.
1. Register #
Sign up a ngrok account here, after that, it will show up a “Setup & Installation” page.
2. Download #
ngrok is just one binary, you can download the version on your platform.
If you are on Raspberry Pi, you can copy the link of Linux(ARM) on the “Setup & Installation” page, which is “https://bin.equinox.io/c/4VmDzA7iaHb/ngrok-stable-linux-arm.zip" for now, and download it via “wget”.
wget https://bin.equinox.io/c/4VmDzA7iaHb/ngrok-stable-linux-arm.zip
3. Installation #
unzip and get the binary. You can double click on Windows or macOS to unzip it.
If you are using Raspberry Pi, use “unzip” command:
unzip ngrok-stable-linux-arm.zip
4. Connect your account #
On the “Setup & Installation” page step 3, it shows the “authtoken”, you need open terminal to run ngrok to add the authtoken to the config file.
./ngrok authtoken [your-authtoken-show-in-step-3]
5. Run ngrok #
“Lomorage Photo Assistant” is using “8000” by default, and ngrok can’t customize subdomain with free account. After runnig successfully, it will show the tunnel url, the subdomain is a random string which might change in next run.
./ngrok http 8000
6. Config tunnel service on Lomorage APP #
Open Lomorage APP on the phone, and in the settings tab, fill the tunnel service host, the host is like “2e30eea5.ngrok.io”, and port should be “443”.
Nginx https proxy (option 2) #
Another option is to open port mapping on your home router and use nginx as reverse https proxy if you have your own domain name. Depends on your familiarity on Nginx, you can either use popular Nginx Proxy Manager tool, or customized nginx configuration by yourselves. Following sections presents both options for you to choose.
If you are using Lomorage image, the login username is “lomoware” and password is “lomorage”;
Nginx Proxy Manager #
Nginx Proxy Manager is a populer self-host tool to easily forward your websites running at home to the public internet. Please refer user guide for installation.
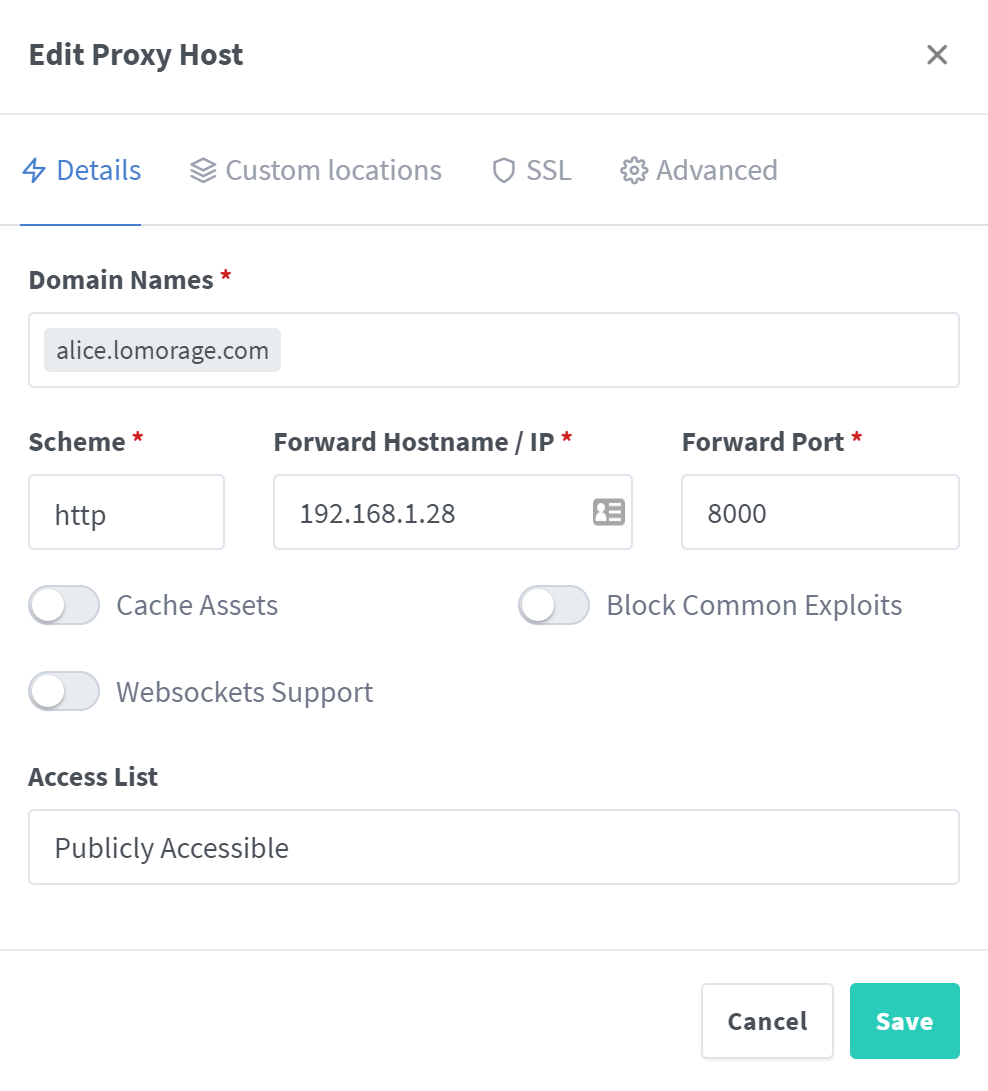
- Click
Add Proxy Host, then set your own domain name and forward ip as below screen. Schema ishttp, and forward port is the listen port configured for lomorage container, 8000 is default listen por t.
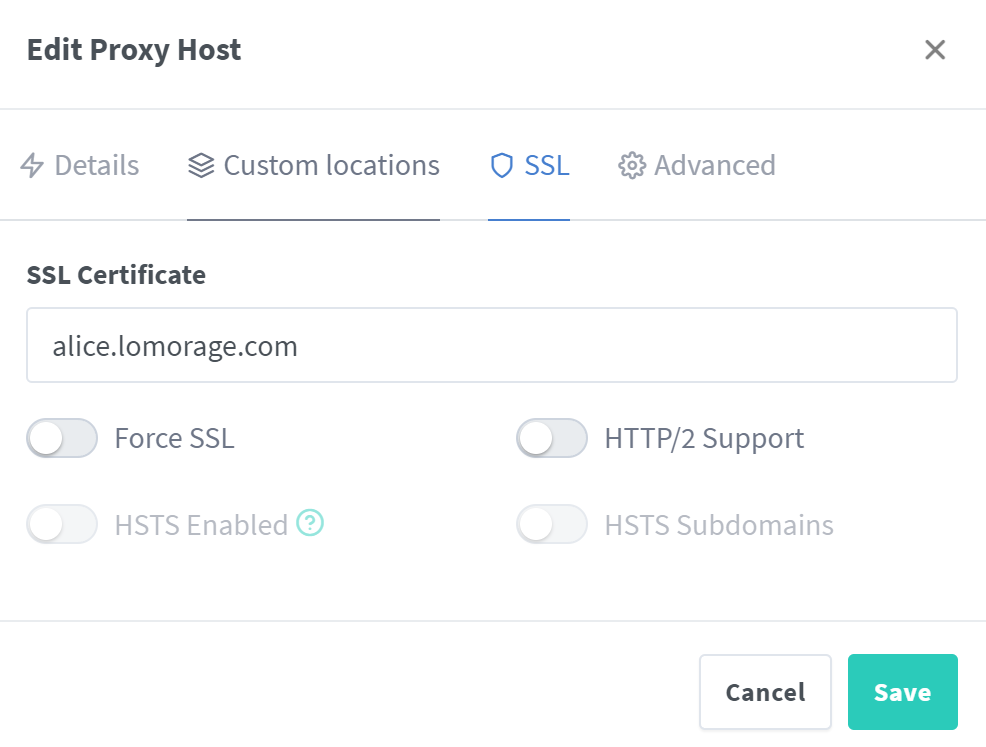
- Enable
SSLconfiguration and set certificate domain name as your own domain name
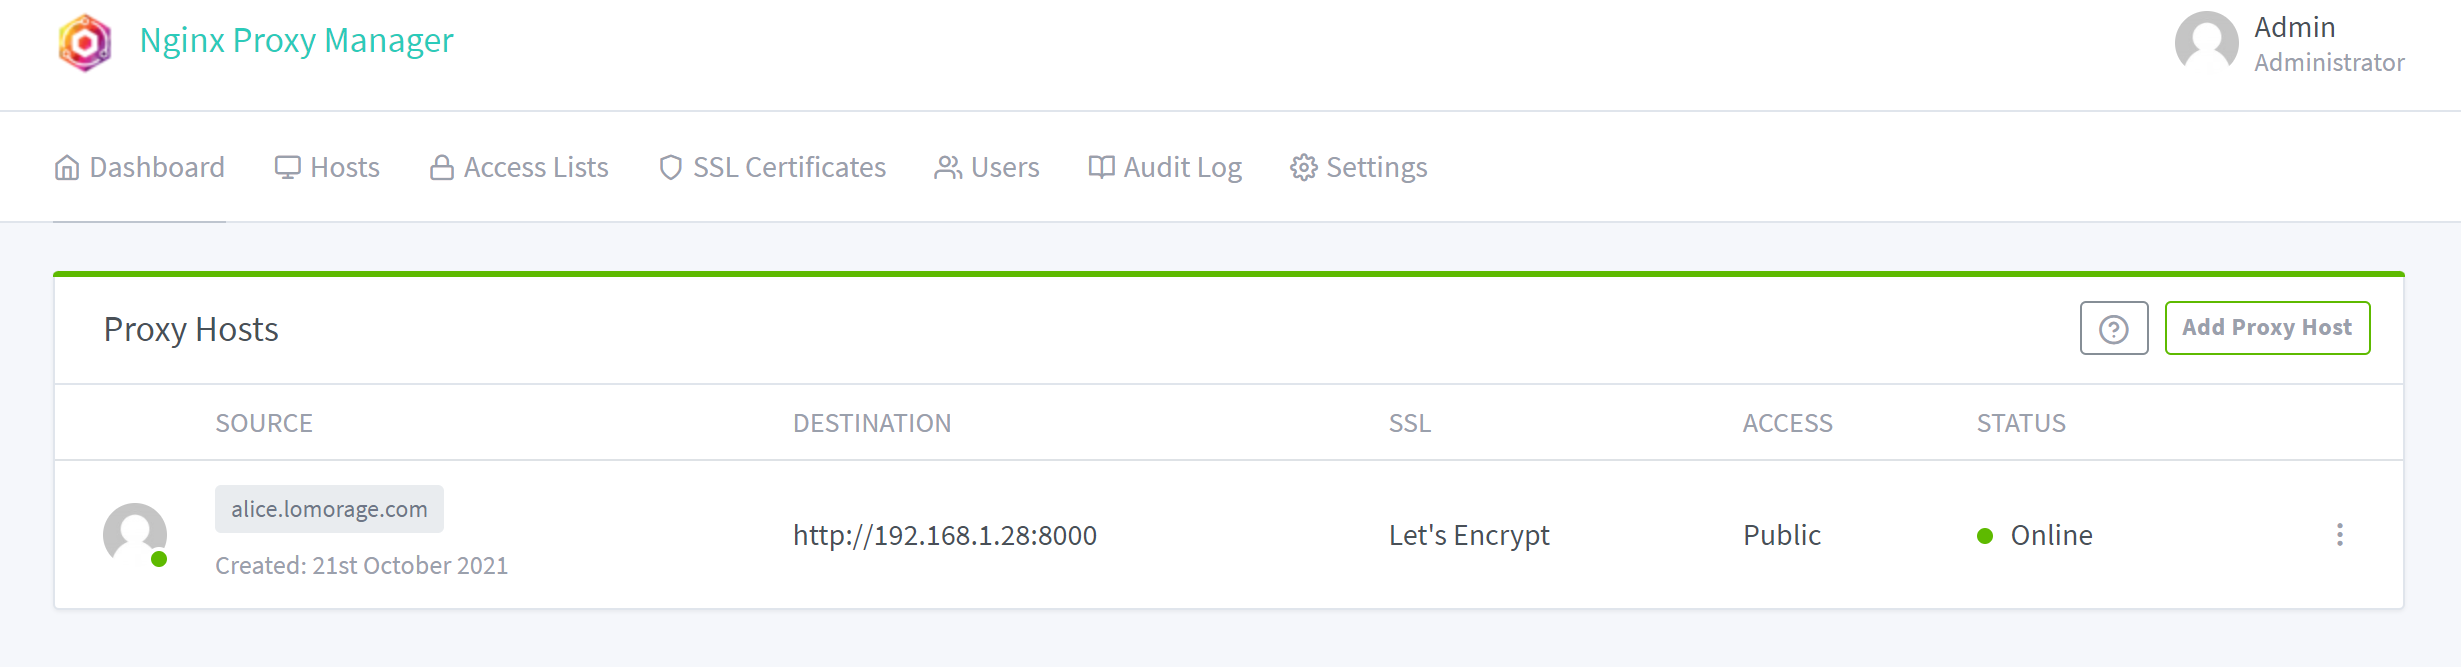
- Click
Save, and below host should be added into the host list
Customize Nginx Configuration #
The following part will use setup in Linux as an example, other platforms are similar since all the software used below are cross platform.
1. Install certbot and Nginx #
$ sudo apt-get install certbot python-certbot-nginx -y
2. generate certificate #
First, make sure you have your domain name configured and opened TCP port mapping 80 and 443 on your home router, and forward those traffic to the device running Nginx on the same port.
Following part will use “bob.lomorage.com” as an example
$ sudo certbot --nginx -d bob.lomorage.com
And this will generate certificate as below:
$ sudo certbot --nginx -d bob.lomorage.com
Saving debug log to /var/log/letsencrypt/letsencrypt.log
Requesting a certificate for bob.lomorage.com

Successfully received certificate.
Certificate is saved at: /etc/letsencrypt/live/bob.lomorage.com/fullchain.pem
Key is saved at:         /etc/letsencrypt/live/bob.lomorage.com/privkey.pem
This certificate expires on 2021-11-14.
These files will be updated when the certificate renews.
Certbot has set up a scheduled task to automatically renew this certificate in the background.
3. config Nginx #
create “/etc/nginx/conf.d/lomorage.conf” (need sudo), and fill with content below (change “bob.lomorage.com” with your own domain name):
server {
    listen 443 ssl;
    listen [::]:443 ssl;
    server_name demo.lomorage.com;

    ssl on;
    ssl_certificate /etc/letsencrypt/live/bob.lomorage.com/fullchain.pem;
    ssl_certificate_key /etc/letsencrypt/live/bob.lomorage.com/privkey.pem;

    location / {
        client_max_body_size 0;
        proxy_pass http://localhost:8000;
        proxy_set_header X-Forwarded-For $remote_addr;
    }
}
If your “Lomorage Photo Assistant” and nginx are running on different devices, change “localhost” to the IP address running Lomorage service.
Now reload config, restart and enable Nginx service
sudo systemctl restart nginx
sudo systemctl enable nginx
Now you can verify the settings using browser by accessing “https://bob.lomorage.com/system" (change “bob.lomorage.com” with your own domain name).